Optimized fork for video diffusion model training with advanced features, SageAttention acceleration, and accurate metrics tracking
This enhanced fork of AI Toolkit is specifically optimized for Wan 2.2 14B I2V (image-to-video) model training. While it supports other models, all features, optimizations, and documentation prioritize video LoRA training success.
Changes
- SageAttention <DISABLED UNTIL SAGE TEAM UPDATE WITH BACK PASS AUTOGRAD OPERATOR, CURRENTLY THIS IS NOT WORKING, USE FLASH ATTENTION>
- Alpha scheduling tuned for video's high variance (10-100x higher than images)
- Per-expert metrics tracking (high_noise and low_noise experts)
- Correct boundary alignment on checkpoint resume
- Video-specific thresholds and exit criteria
- Adamw8bit loss bug fixed (wasnt huge but was worth doing)
Metrics:
- Real-time EMA (Exponential Moving Average) tracking
- Per-expert loss and gradient stability monitoring
- Fixed metrics corruption on resume (critical bug fixed Nov 2024)
- Accurate training health indicators optimized for video training
** Performance & Compatibility:**
- PyTorch nightly support (CUDA 13.0)
- Full RTX 50-series (Blackwell) support
- basically tested on various different configs and confirmed working.
This fork adds Alpha Scheduling, Advanced Metrics Tracking, and SageAttention Support for video LoRA training. These features provide automatic progression through training phases, accurate real-time visibility into training health, and optimized performance for Wan models <CONFIRMED NOT WORKING UNTIL SAGE ATTENTION IMPLEMENT BACK PASS AUTOGRAD OPTIMIZER - USE FLASH ATTENTION>
Automatically adjusts LoRA alpha values through defined phases as training progresses, optimizing for stability and quality. NB:- Gradient stability can drift to 47% when stable so probably aim for this in your yaml and not above 50%
Key Benefits:
- Conservative start (α=8): Stable early training, prevents divergence
- Progressive increase (α=8→14→20): Gradually adds LoRA strength
- Automatic transitions: Based on loss plateau and gradient stability (in theory, still needs more testing)
Files Added:
toolkit/alpha_scheduler.py- Core alpha scheduling logic with phase managementtoolkit/alpha_metrics_logger.py- JSONL metrics logging for UI visualization
Files Modified:
jobs/process/BaseSDTrainProcess.py- Alpha scheduler integration and checkpoint save/loadtoolkit/config_modules.py- NetworkConfig alpha_schedule extractiontoolkit/kohya_lora.py- LoRANetwork alpha scheduling supporttoolkit/lora_special.py- LoRASpecialNetwork initialization with schedulertoolkit/models/i2v_adapter.py- I2V adapter alpha scheduling integrationtoolkit/network_mixins.py- SafeTensors checkpoint save fix for non-tensor state
Real-time training metrics with loss trend analysis, gradient stability, and phase tracking.
Metrics Captured:
- Loss analysis: Slope (linear regression), R² (trend confidence), CV (variance) (alpha scheduling)
- Gradient stability: Sign agreement rate from automagic optimizer (target: 0.55)
- Phase tracking: Current phase, steps in phase, alpha values
- Per-expert metrics: Separate tracking for MoE (Mixture of Experts) models with correct boundary alignment
- EMA (Exponential Moving Average): Weighted averaging that prioritizes recent steps (10/50/100 step windows)
- Loss history: 200-step window for trend analysis
fix changelog:
- Fixed boundary misalignment on resume: Metrics now correctly track which expert is training after checkpoint resume
- Fixed off-by-one error:
steps_this_boundarycalculation now accurately reflects training state - Added EMA calculations: UI now displays both simple averages and EMAs for better trend analysis
Files Added:
ui/src/components/JobMetrics.tsx- React component for metrics visualization with EMA supportui/src/app/api/jobs/[jobID]/metrics/route.ts- API endpoint for metrics dataui/cron/actions/monitorJobs.ts- Background monitoring with metrics sync
Files Modified:
jobs/process/BaseSDTrainProcess.py- Added boundary realignment logic for correct resume behaviorextensions_built_in/sd_trainer/SDTrainer.py- Added debug logging for boundary switchesui/src/app/jobs/[jobID]/page.tsx- Integrated metrics displayui/cron/worker.ts- Metrics collection in worker processui/cron/actions/startJob.ts- Metrics initialization on job starttoolkit/optimizer.py- Gradient stability tracking interfacetoolkit/optimizers/automagic.py- Gradient sign agreement
Files Added:
toolkit/models/wan_sage_attn.py- SageAttention implementation (inference-only, broken until back pass operator is implemented which is likely to be never).
Files Modified:
jobs/process/BaseSDTrainProcess.py- SageAttention disabled for training, works for inferencerequirements.txt- Added sageattention dependency (optional)
Alternative: Use attention_backend: flash or attention_backend: native for training - requires flash attention compilation which is too tricky to include in a requirements.txt - you will have to build this yourself
Thresholds and configurations specifically tuned for video I2V (image-to-video) training.
Why Video is Different:
- 10-100x higher variance than image training
- R² threshold: 0.01 (vs 0.1 for images) - video has extreme noise
- Loss plateau threshold: 0.005 (vs 0.001) - slower convergence
- Gradient stability: 0.50 minimum (vs 0.55) - more tolerance for variance
See config_examples/i2v_lora_alpha_scheduling.yaml for a complete example with alpha scheduling enabled.
Quick Example:
network:
  type: lora
  linear: 64
  linear_alpha: 16
  conv: 64
  alpha_schedule:
    enabled: true
    linear_alpha: 16
    conv_alpha_phases:
      foundation:
        alpha: 8
        min_steps: 2000
        exit_criteria:
          loss_improvement_rate_below: 0.005
          min_gradient_stability: 0.50
          min_loss_r2: 0.01
      balance:
        alpha: 14
        min_steps: 3000
        exit_criteria:
          loss_improvement_rate_below: 0.005
          min_gradient_stability: 0.50
          min_loss_r2: 0.01
      emphasis:
        alpha: 20
        min_steps: 2000
Metrics are logged to output/{job_name}/metrics_{job_name}.jsonl in newline-delimited JSON format:
{
  "step": 2500,
  "timestamp": "2025-10-29T18:19:46.510064",
  "loss": 0.087,
  "gradient_stability": 0.51,
  "expert": null,
  "lr_0": 7.06e-05,
  "lr_1": 0.0,
  "alpha_enabled": true,
  "phase": "balance",
  "phase_idx": 1,
  "steps_in_phase": 500,
  "conv_alpha": 14,
  "linear_alpha": 16,
  "loss_slope": 0.00023,
  "loss_r2": 0.007,
  "loss_samples": 200,
  "gradient_stability_avg": 0.507
}Loss R² - Trend confidence (video: expect 0.01-0.05)
- Below 0.01: Very noisy (normal for video early on)
- 0.01-0.05: Good trend for video training
- Above 0.1: Strong trend (rare in video) TEST HEURISTIC ONLY, NOT CONFIRMED TO BE ACCURATE ACROSS RECENT CHANGES
Alpha Scheduler Not Activating:
- Verify
alpha_schedule.enabled: truein your config - Check logs for "Alpha scheduler enabled with N phases"
- Ensure you're using a supported network type (LoRA)
No Automatic Transitions:
- Video training may not reach strict R² thresholds
- Consider video-optimized exit criteria (see example config)
- Check metrics: loss_slope, loss_r2, gradient_stability
Checkpoint Save Errors:
- Alpha scheduler state is saved to separate JSON file
- Format:
{checkpoint}_alpha_scheduler.json - Loads automatically when resuming from checkpoint
Phase Transition Logic:
- Minimum steps in phase must be met
- Loss slope < threshold (plateau detection)
- Gradient stability > threshold
- Loss R² > threshold (trend validity)
- Loss CV < 0.5 (variance check)
All criteria must be satisfied for automatic transition.
Loss Trend Analysis:
- Uses linear regression on 200-step loss window
- Calculates slope (improvement rate) and R² (confidence)
- Minimum 20 samples required before trends are reported
- Updates every step for real-time monitoring
Gradient Stability:
- Measures sign agreement rate of gradients (from automagic optimizer)
- Target range: 0.55-0.70 (images), 0.50-0.65 (video)
- Tracked over 200-step rolling window
- Used as stability indicator for phase transitions
- Example Config:
config_examples/i2v_lora_alpha_scheduling.yaml - Upstream: ostris/ai-toolkit
- This Fork: relaxis/ai-toolkit
What you'll need:
- 10-30 images (or videos) of what you want to teach
- Text descriptions for each image
- An Nvidia GPU (at least 12GB VRAM recommended)
- ~30 minutes to a few hours depending on your data
What will happen:
- Setup (5 min): Install the software
- Prepare data (10 min): Organize your images and write captions
- Start training (30 min - 3 hrs): The AI learns from your data
- Use your LoRA: Apply it to generate new images/videos
Requirements:
- python >3.10
- Nvidia GPU with enough VRAM (12GB minimum, 24GB+ recommended)
- python venv
- git
This installation uses PyTorch nightly builds for best compatibility with latest features including SageAttention:
Linux:
git clone https://github.com/relaxis/ai-toolkit.git
cd ai-toolkit
python3 -m venv venv
source venv/bin/activate

# Install PyTorch nightly with CUDA 13.0 support
pip3 install --pre torch torchvision torchaudio --index-url https://download.pytorch.org/whl/nightly/cu130

# Install all dependencies (includes sageattention, lycoris-lora, etc.)
pip3 install -r requirements.txt

# Verify installation
python3 -c "import torch; print(f'PyTorch {torch.__version__}')"
python3 -c "import sageattention; print('SageAttention installed')"
Windows:
If you are having issues with Windows, I recommend using the easy install script at https://github.com/Tavris1/AI-Toolkit-Easy-Install (modify the git clone URL to use relaxis/ai-toolkit)
git clone https://github.com/relaxis/ai-toolkit.git
cd ai-toolkit
python -m venv venv
.\venv\Scripts\activate

# Install PyTorch nightly with CUDA 13.0 support
pip install --pre torch torchvision torchaudio --index-url https://download.pytorch.org/whl/nightly/cu130

# Install all dependencies
pip install -r requirements.txt

# Verify installation
python -c "import torch; print(f'PyTorch {torch.__version__}')"
python -c "import sageattention; print('SageAttention installed')"
Key packages included in requirements.txt:
- PyTorch nightly (cu130): Latest features and bug fixes
- SageAttention ≥2.0.0: <BORKED - SORRY>
- Lycoris-lora 1.8.3: Advanced LoRA architectures
- TorchAO 0.10.0: Quantization and optimization tools
- Diffusers (latest): HuggingFace diffusion models library
- Transformers 4.52.4: Model architectures and utilities
Blackwell GPUs (RTX 5090, 5080, 5070, etc.) require CUDA 13.0 or newer.
The PyTorch nightly installation above includes Blackwell support built-in. No additional CUDA installation needed for basic training - PyTorch ships with its own CUDA libraries.
If you want to compile flash attention for Blackwell (optional):
- Install CUDA 13.0 toolkit (required only for compilation):
# Download from: https://developer.nvidia.com/cuda-13-0-download-archive
# Or use package manager (Ubuntu example):
wget https://developer.download.nvidia.com/compute/cuda/repos/ubuntu2404/x86_64/cuda-keyring_1.1-1_all.deb
sudo dpkg -i cuda-keyring_1.1-1_all.deb
sudo apt-get update
sudo apt-get install cuda-toolkit-13-0- Compile flash attention:
source venv/bin/activate

export CUDA_HOME=/usr/local/cuda-13.0  # Point to CUDA 13.0
export TORCH_CUDA_ARCH_LIST="10.0+PTX"  # Blackwell compute capability
FLASH_ATTENTION_FORCE_BUILD=TRUE MAX_JOBS=8 pip install flash-attn --no-build-isolation

# Verify
python -c "import flash_attn; print('Flash Attention OK')"
nvidia-smi  # Should show CUDA 13.0+ driver
Note: Flash attention compilation is completely optional. SageAttention provides excellent performance without it, and most users won't need flash attention at all.
Or install the original version:
Replace relaxis/ai-toolkit with ostris/ai-toolkit in the commands above.
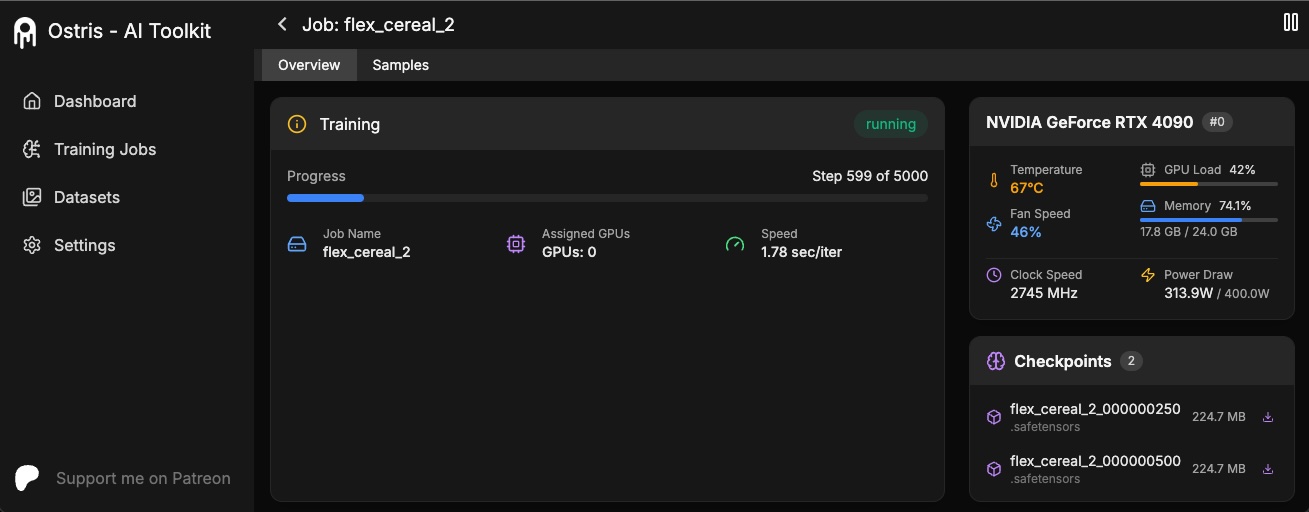
The AI Toolkit UI is a web interface for the AI Toolkit. It allows you to easily start, stop, and monitor jobs. It also allows you to easily train models with a few clicks. It also allows you to set a token for the UI to prevent unauthorized access so it is mostly safe to run on an exposed server.
Requirements:
- Node.js > 18
The UI does not need to be kept running for the jobs to run. It is only needed to start/stop/monitor jobs. The commands below will install / update the UI and it's dependencies and start the UI.
cd ui
npm run build_and_start
You can now access the UI at http://localhost:8675 or http://<your-ip>:8675 if you are running it on a server.
If you are hosting the UI on a cloud provider or any network that is not secure, I highly recommend securing it with an auth token.
You can do this by setting the environment variable AI_TOOLKIT_AUTH to super secure password. This token will be required to access
the UI. You can set this when starting the UI like so:
# Linux
AI_TOOLKIT_AUTH=super_secure_password npm run build_and_start

# Windows
set AI_TOOLKIT_AUTH=super_secure_password && npm run build_and_start

# Windows Powershell
$env:AI_TOOLKIT_AUTH="super_secure_password"; npm run build_and_startDatasets generally need to be a folder containing images and associated text files. Currently, the only supported
formats are jpg, jpeg, and png. Webp currently has issues. The text files should be named the same as the images
but with a .txt extension. For example image2.jpg and image2.txt. The text file should contain only the caption.
You can add the word [trigger] in the caption file and if you have trigger_word in your config, it will be automatically
replaced.
What changed: This fork improves how images/videos with different sizes and aspect ratios are grouped for training.
Images are never upscaled but they are downscaled and placed in buckets for batching. You do not need to crop/resize your images. The loader will automatically resize them and can handle varying aspect ratios.
Improvements in this fork:
- Better video aspect ratio handling: Videos with mixed aspect ratios (16:9, 9:16, 1:1) batch more efficiently
- Pixel count optimization: Instead of fixed resolutions, uses
max_pixels_per_framefor flexible sizing - Smarter bucketing: Groups similar aspect ratios together to minimize wasted VRAM
- Per-video frame counts: Each video can have different frame counts (33, 41, 49) without issues
For video datasets:
datasets:
  - folder_path: /path/to/videos
    resolution: [512]  # Base resolution
    max_pixels_per_frame: 262144  # ~512x512, flexible per aspect ratio
    num_frames: 33  # Default, can vary per video
The system will automatically:
- Calculate optimal resolution for each video's aspect ratio
- Group similar sizes into buckets
- Minimize padding/cropping
- Maximize VRAM utilization
To prevent temporal overfitting (where the model memorizes exact frame timings), you can add random frame sampling variation:
datasets:
  - folder_path: /path/to/videos
    num_frames: 33
    temporal_jitter: 1  # ±1 frame randomness per sample point
How it works:
- Applies independent ±N frame offset to each sampled frame index
- Creates natural variation between epochs without breaking motion continuity
- Helps prevent artifacts like "frothy blobs" in liquid/motion generation
Recommended settings:
temporal_jitter: 1- Conservative, works well for most casestemporal_jitter: 2- More aggressive variationtemporal_jitter: 0- Disable for finisher phases requiring maximum precision
Works with both shrink_video_to_frames: true and false modes.
To train specific layers with LoRA, you can use the only_if_contains network kwargs. For instance, if you want to train only the 2 layers
used by The Last Ben, mentioned in this post, you can adjust your
network kwargs like so:
      network:
        type: "lora"
        linear: 128
        linear_alpha: 128
        network_kwargs:
          only_if_contains:
            - "transformer.single_transformer_blocks.7.proj_out"
            - "transformer.single_transformer_blocks.20.proj_out"
The naming conventions of the layers are in diffusers format, so checking the state dict of a model will reveal the suffix of the name of the layers you want to train. You can also use this method to only train specific groups of weights. For instance to only train specific transformer blocks in Wan 2.2, you can use the following:
      network:
        type: "lora"
        linear: 128
        linear_alpha: 128
        network_kwargs:
          only_if_contains:
            - "transformer.transformer_blocks."
You can also exclude layers by their names by using ignore_if_contains network kwarg. So to exclude all the single transformer blocks,
      network:
        type: "lora"
        linear: 128
        linear_alpha: 128
        network_kwargs:
          ignore_if_contains:
            - "transformer.single_transformer_blocks."
ignore_if_contains takes priority over only_if_contains. So if a weight is covered by both,
if will be ignored.
To learn more about LoKr, read more about it at KohakuBlueleaf/LyCORIS. To train a LoKr model, you can adjust the network type in the config file like so:
      network:
        type: "lokr"
        lokr_full_rank: true
        lokr_factor: 8
Everything else should work the same including layer targeting.
This fork is specifically optimized for Wan 2.2 14B I2V (image-to-video) training with advanced features not available in the original toolkit.
See the complete example at config_examples/i2v_lora_alpha_scheduling.yaml
Key differences for video vs image training:
network:
  type: lora
  linear: 64
  linear_alpha: 16
  conv: 64
  alpha_schedule:
    enabled: true
    linear_alpha: 16
    conv_alpha_phases:
      foundation:
        alpha: 8
        min_steps: 2000
        exit_criteria:
          # Video-optimized thresholds (10-100x more tolerant)
          loss_improvement_rate_below: 0.005  # vs 0.001 for images
          min_gradient_stability: 0.50         # vs 0.55 for images
          min_loss_r2: 0.01                    # vs 0.1 for images
      balance:
        alpha: 14
        min_steps: 3000
        exit_criteria:
          loss_improvement_rate_below: 0.005
          min_gradient_stability: 0.50
          min_loss_r2: 0.01
      emphasis:
        alpha: 20
        min_steps: 2000
Video datasets should be organized as:
/datasets/your_videos/
├── video1.mp4
├── video1.txt (caption)
├── video2.mp4
├── video2.txt
└── ...
For I2V (image-to-video) training:
datasets:
  - folder_path: /path/to/videos
    caption_ext: txt
    caption_dropout_rate: 0.3
    resolution: [512]
    max_pixels_per_frame: 262144
    shrink_video_to_frames: true
    num_frames: 33  # or 41, 49, etc.
do_i2v: true # Enable I2V modeVideo training produces noisier metrics than image training. Expect:
- Loss R²: 0.007-0.05 (vs 0.1-0.3 for images)
- Gradient Stability: 0.45-0.60 (vs 0.55-0.70 for images)
- Phase Transitions: Longer times to plateau (video variance is high)
Check metrics at: output/{job_name}/metrics_{job_name}.jsonl
Primary Support: Wan 2.2 14B I2V
This fork is designed and tested specifically for Wan 2.2 14B I2V with full support for:
- Mixture of Experts (MoE) training with high_noise and low_noise experts
- Automatic boundary switching every 100 steps
- SageAttention optimization (detected automatically)
- Per-expert metrics tracking and EMA cal
Configuration for Wan 2.2 14B I2V:
model:
  name_or_path: "ai-toolkit/Wan2.2-I2V-A14B-Diffusers-bf16"
  arch: "wan22_14b_i2v"
  quantize: true
  qtype: "uint4|ostris/accuracy_recovery_adapters/wan22_14b_i2v_torchao_uint4.safetensors"
  model_kwargs:
    train_high_noise: true
    train_low_noise: true

train:
switch_boundary_every: 100 # Switch between experts every 100 stepsNew to LoRA training? Here's what all those numbers mean.
- Learning Rate (
lr): How big the training updates are (set in config) - Alpha Values (
conv_alpha,linear_alpha): LoRA strength (auto-adjusted with alpha scheduling) - Batch Size: How many images per step (limited by VRAM)
- Training Steps: How long to train
What it is: How wrong your model's predictions are Good value: Going down over time Your training: Should start high (~0.5-1.0) and decrease to ~0.02-0.1
What it is: How consistent your training updates are (0-100%) Good value: Video >50%, Images >55% What it means: Below 50% = unstable training, won't transition phases Can you change it?: NO - this measures training dynamics
What it is: How well we can predict your loss trend (0-1 scale) Good value: Video >0.01, Images >0.1 What it means: Confirms loss is actually plateauing, not just noisy Can you change it?: NO - this is measured from your loss history
What it is: How fast loss is changing Good value: Negative (improving), near zero (plateaued) What it means: -0.0001 = good improvement, close to 0 = ready for next phase