收集一些輔助工具的筆記
- host/client 僅需要安裝chrome瀏覽器以及google帳號。
host 進入remotedesktop 直接輸入https://remotedesktop.google.com/
登入host google帳號
遠端存取-> 設定遠端存取功能 -> (下載plugin)-> 設定好名稱pin碼 -> OK
client 使用host google帳號登入 chrome
進入remotedesktop
遠端存取-> 遠端裝置 (此帳號分享的裝置)-> 第一次連線要輸入pin碼
操作設定:進入遠端桌面畫面後,右側有個箭頭,點開可以設定解析度等等,也可以中斷連線。直接關閉分頁也可以中斷連線。
-
最好先利用colab打包成一個檔案之後再下載。
-
https://stackoverflow.com/questions/25010369/wget-curl-large-file-from-google-drive
gdown
pip install gdown
gdown https://drive.google.com/uc?id=<file_id> # for files gdown <file_id> # alternative format gdown --folder https://drive.google.com/drive/folders/<file_id> # for folders gdown --folder --id <file_id> # this format works for folders too
The gdrive folder with url: https://drive.google.com/drive/folders/144 sdf has more than 50 files, gdrive can't download more than this limit, if you are ok with this, please run again with --remaining-ok flag.
預設只能下載50個檔案!
vim ~/[your_venv]/lib/python3.9/site-packages/gdown/download_folder.py MAX_NUMBER_FILES = 50 # set to large number eg. 10000
- 某些檔案的權限沒設分享或下載次數太多被封 Cannot retrieve the public link of the file. You may need to change the permission to 'Anyone with the link', or have had many accesses.
You may still be able to access the file from the browser:
https://drive.google.com/uc?id=1Z0ykjS0r-D8InbdkUF5RdIzBRTvVy0Yt
PS. cp -afpR 拷貝雲端硬碟到macOS外接碟會很慢,cp -r會快很多就是..
youtube-dl https://www.youtube.com/watch?v=rkAfWfZkfyo
-F 查詢有什麼格式可以下載
-f 下載指定的格式
-a 由檔案中的列表下載
--extract-audio --audio-format mp3 youtube沒有mp3格式,會自動轉檔一次(mac/linux預設用ffmpeg)
例如:僅下載mp3音訊
彩虹小馬列表_url_only.txt
https://www.youtube.com/watch?v=mrjXQp3f4Uo
https://www.youtube.com/watch?v=n8miGs6-zKo
https://www.youtube.com/watch?v=wjsv-6wfqyg
https://www.youtube.com/watch?v=wb-6vKk3MJg
下載
youtube-dl --extract-audio --audio-format mp3 -a 彩虹小馬列表_url_only.txt
[2024-05-03]
ERROR: Unable to extract uploader id; please report this issue on https://yt-dl.org/bug . Make sure you are using the latest version; see https://yt-dl.org/update on how to update. Be sure to call youtube-dl with the --verbose flag and include its complete output. 目前master已經修正,但Mac的homebrew仍然是舊版無解中。ytdl-org/youtube-dl#31530 可以改用pypy版本使用: pip install --upgrade --force-reinstall "git+https://github.com/ytdl-org/youtube-dl.git"
完整重新安裝流程: 1.安裝 git (如果未安裝 | 檢查指令:$ git --version) sudo apt install git
2.安裝 pip (Python 套件管理器,如果未安裝) sudo apt install pip
- 直接從 git 儲存庫重新安裝 youtube-dl sudo pip install --upgrade --force-reinstall "git+https://github.com/ytdl-org/youtube-dl.git"
[2024-12-26] 看來youtube又更改了他們的網頁配置,所以現在ydl又無法使用了!!
WARNING: [youtube] Falling back to generic n function search
ERROR: Unable to extract nsig function code (caused by RegexNotFoundError('Unable to extract \x1b[0;34mInitial JS player n function name\x1b[0m; please report this issue on https://github.com/ytdl-org/youtube-dl/issues , using the appropriate issue template. Make sure you are using the latest version; see https://github.com/ytdl-org/youtube-dl/#user-content-installation on how to update. Be sure to call youtube-dl with the --verbose option and include the complete output.')); please report this issue on https://github.com/ytdl-org/youtube-dl/issues , using the appropriate issue template. Make sure you are using the latest version; see https://github.com/ytdl-org/youtube-dl/#user-content-installation on how to update. Be sure to call youtube-dl with the --verbose option and include the complete output. pip install -U yt-dlp 不能下載時請更新版本
brew install ffmpeg 轉mp3
下載 YouTube 影片的 MP3 假設你有一個 YouTube 影片的網址,例如 https://www.youtube.com/watch?v=VIDEO_ID,以下是下載 MP3 的命令:
yt-dlp -x --audio-format mp3 --audio-quality 0 "https://www.youtube.com/watch?v=VIDEO_ID"

參數說明:
-x:提取音頻。
--audio-format mp3:指定輸出格式為 MP3。
--audio-quality 0:設置最佳音質(0 表示最高質量)。
"https://www.youtube.com/watch?v=VIDEO_ID":替換為你要下載的 YouTube 影片網址。

指定輸出檔名: 如果想自訂檔名,可以使用 -o 參數:例如:-o "my_music.%(ext)s" 會將檔案命名為 my_music.mp3。
嵌入元數據(如標題、作者): 添加 --add-metadata 來保留影片的元數據(例如歌曲標題、藝術家等)
使用 yt-dlp 下載 YouTube 影片為 MP4 :
- 已安裝 yt-dlp:確保已透過
pip install -U yt-dlp安裝最新版本。 - 已安裝 ffmpeg:雖然 MP4 下載通常不強制需要 ffmpeg,但若涉及合併視頻/音頻流或轉換格式,ffmpeg 是必需的(安裝方式參見前述 MP3 指南)。
- 網路連線:確保能正常訪問 YouTube。
假設 YouTube 影片網址為 https://www.youtube.com/watch?v=VIDEO_ID,基本下載 MP4 的命令如下:
yt-dlp -f "bestvideo[ext=mp4]+bestaudio[ext=m4a]/best[ext=mp4]" "https://www.youtube.com/watch?v=VIDEO_ID"-f "bestvideo[ext=mp4]+bestaudio[ext=m4a]/best[ext=mp4]":bestvideo[ext=mp4]:選擇最佳的 MP4 格式視頻流。bestaudio[ext=m4a]:選擇最佳的 M4A 格式音頻流(YouTube 常見音頻格式)。+:合併視頻和音頻流(需要 ffmpeg)。/best[ext=mp4]:若無法合併,則選擇最佳的單一 MP4 檔案(已包含音頻)。
- 網址:替換為目標 YouTube 影片的實際網址。
這條命令會下載最高質量的 MP4 影片(視頻+音頻)。
以下是下載 MP4 時常用的參數,根據需求選擇:
YouTube 提供多種解析度(如 720p、1080p、4K)。若想指定畫質,可用 -f 參數結合格式代碼:
-
列出可用格式: 先檢查影片支援的格式:
yt-dlp -F "https://www.youtube.com/watch?v=VIDEO_ID"這會顯示格式代碼(format code),例如:
136 mp4 1280x720 720p 137 mp4 1920x1080 1080p 140 m4a audio only -
下載特定畫質(例如 720p):
yt-dlp -f "136+bestaudio[ext=m4a]/best[ext=mp4]" "https://www.youtube.com/watch?v=VIDEO_ID"
這裡
136是 720p 視頻的格式代碼,bestaudio[ext=m4a]確保音頻合併。
使用 -o 參數指定輸出檔案名稱:
yt-dlp -f "best[ext=mp4]" -o "影片名稱.%(ext)s" "https://www.youtube.com/watch?v=VIDEO_ID"%(ext)s:自動填入檔案副檔名(例如 mp4)。- 其他可用變數:
%(title)s(影片標題)、%(id)s(影片 ID)等。
若要下載整個播放清單的 MP4 影片:
yt-dlp -f "best[ext=mp4]" "https://www.youtube.com/playlist?list=PLAYLIST_ID"- 可結合
--playlist-start和--playlist-end指定範圍,例如:yt-dlp -f "best[ext=mp4]" --playlist-start 1 --playlist-end 5 "https://www.youtube.com/playlist?list=PLAYLIST_ID"
若影片有字幕,可下載並嵌入 MP4:
yt-dlp -f "best[ext=mp4]" --embed-subs --sub-lang zh-TW,en "https://www.youtube.com/watch?v=VIDEO_ID"--embed-subs:將字幕嵌入 MP4 檔案(需要 ffmpeg)。--sub-lang:指定字幕語言(例如zh-TW為繁體中文,en為英文)。
若網路不穩定,可用 --limit-rate 限制速度:
yt-dlp -f "best[ext=mp4]" --limit-rate 1M "https://www.youtube.com/watch?v=VIDEO_ID"1M表示 1MB/s,可調整數值。
添加 --embed-metadata 保留影片資訊(如標題、作者):
yt-dlp -f "best[ext=mp4]" --embed-metadata "https://www.youtube.com/watch?v=VIDEO_ID"-
下載 4K 影片: 4K 影片通常需要合併視頻和音頻流:
yt-dlp -f "bestvideo[height=2160][ext=mp4]+bestaudio[ext=m4a]/best[ext=mp4]" "https://www.youtube.com/watch?v=VIDEO_ID"
height=2160:指定 4K(2160p)解析度。
-
下載僅視頻(無音頻):
yt-dlp -f "bestvideo[ext=mp4]" "https://www.youtube.com/watch?v=VIDEO_ID"
-
下載特定時間段: 使用
--download-sections截取影片片段:yt-dlp -f "best[ext=mp4]" --download-sections "*00:30-01:30" "https://www.youtube.com/watch?v=VIDEO_ID"
*00:30-01:30:下載從 30 秒到 1 分 30 秒的片段。
- 切換儲存路徑:在終端機中使用
cd 資料夾路徑進入目標資料夾。 - 執行命令:複製貼上指令,等待下載完成。
- 檢查檔案:下載的 MP4 檔案會儲存在當前資料夾,確認是否可正常播放。
- 錯誤:無法合併視頻/音頻: 確保 ffmpeg 已正確安裝並加入系統路徑。
- 格式不可用:
使用
yt-dlp -F檢查可用格式,選擇合適的格式代碼。 - 地區限制: 若影片受地區限制,可嘗試使用代理或 VPN。
- 下載速度慢:
檢查網路,或更新 yt-dlp:
pip install -U yt-dlp
有用過下面幾種,常用OpenShot來做臨時的短片。
後來都用iMove來處理短片,但iMove對4K(>3440x1440以上)無法預覽使得特效、字幕、標註等無法當下確定時間與位置,且最終僅能輸出FHD(1920x1080)。只能裝Shotcut應急。
- Top 3. PiTiVi 視頻編輯器
- Top 4. Shotcut 視頻編輯器 (4k)
- Top 5. Blender 視頻編輯器
- Top 6. OpenShot 視頻編輯器
https://acemovi.tuneskit.com/review/best-ubuntu-video-editor.html
Shotcut 轉場效果範例 (拖曳影片嵌入另一端內重疊,即可選轉場屬性。) https://forum.gamer.com.tw/C.php?bsn=60030&snA=542068
Shotcut 自訂畫面比例 21:9 (3440x1440) OK
Shotcut 加入線條、箭頭、任何其他圖案,可用去背的PNG圖檔加入另一個視訊軌。
其實基本轉換只要用Mac上內建的功能就可以做了。 轉語音檔的方法有兩種,先講麻煩一點、但可以做細部設定的。 1. 首先要做點準備動作。打開「系統偏好設定」,找到「輔助使用」。
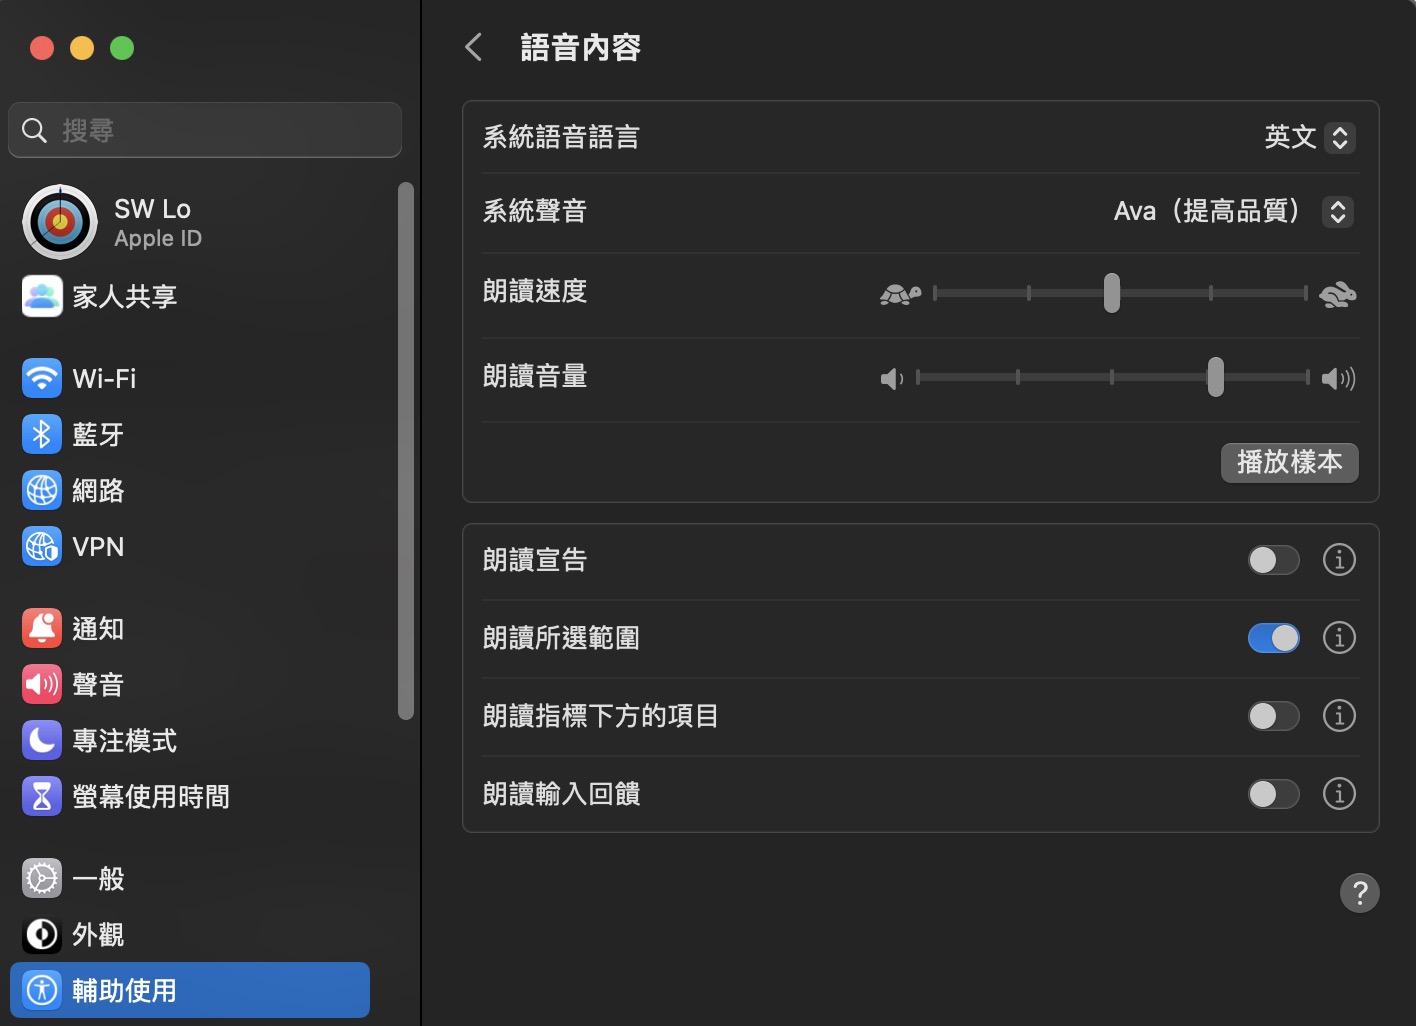
如果是要轉換中文文章,「系統聲音」選單中只有三種語音可以選:「Mei-Jia」(台灣)、「Ting-Ting」(中國)、「Sin-ji」(香港,廣東話)。 其他語文就依此類推,自己選擇;但如果選到不懂中文的語音,就只會聽到它胡言亂語了。 在「朗讀速度」選項中,可以調整自己習慣的閱讀速度。 最下面的「按下按鍵時朗讀所選的文字」如果打勾,就可以在閱讀文章時選取段落、再按下指定的按鍵組合(預設是Option+Esc,可以改),即時收聽閱讀語音。
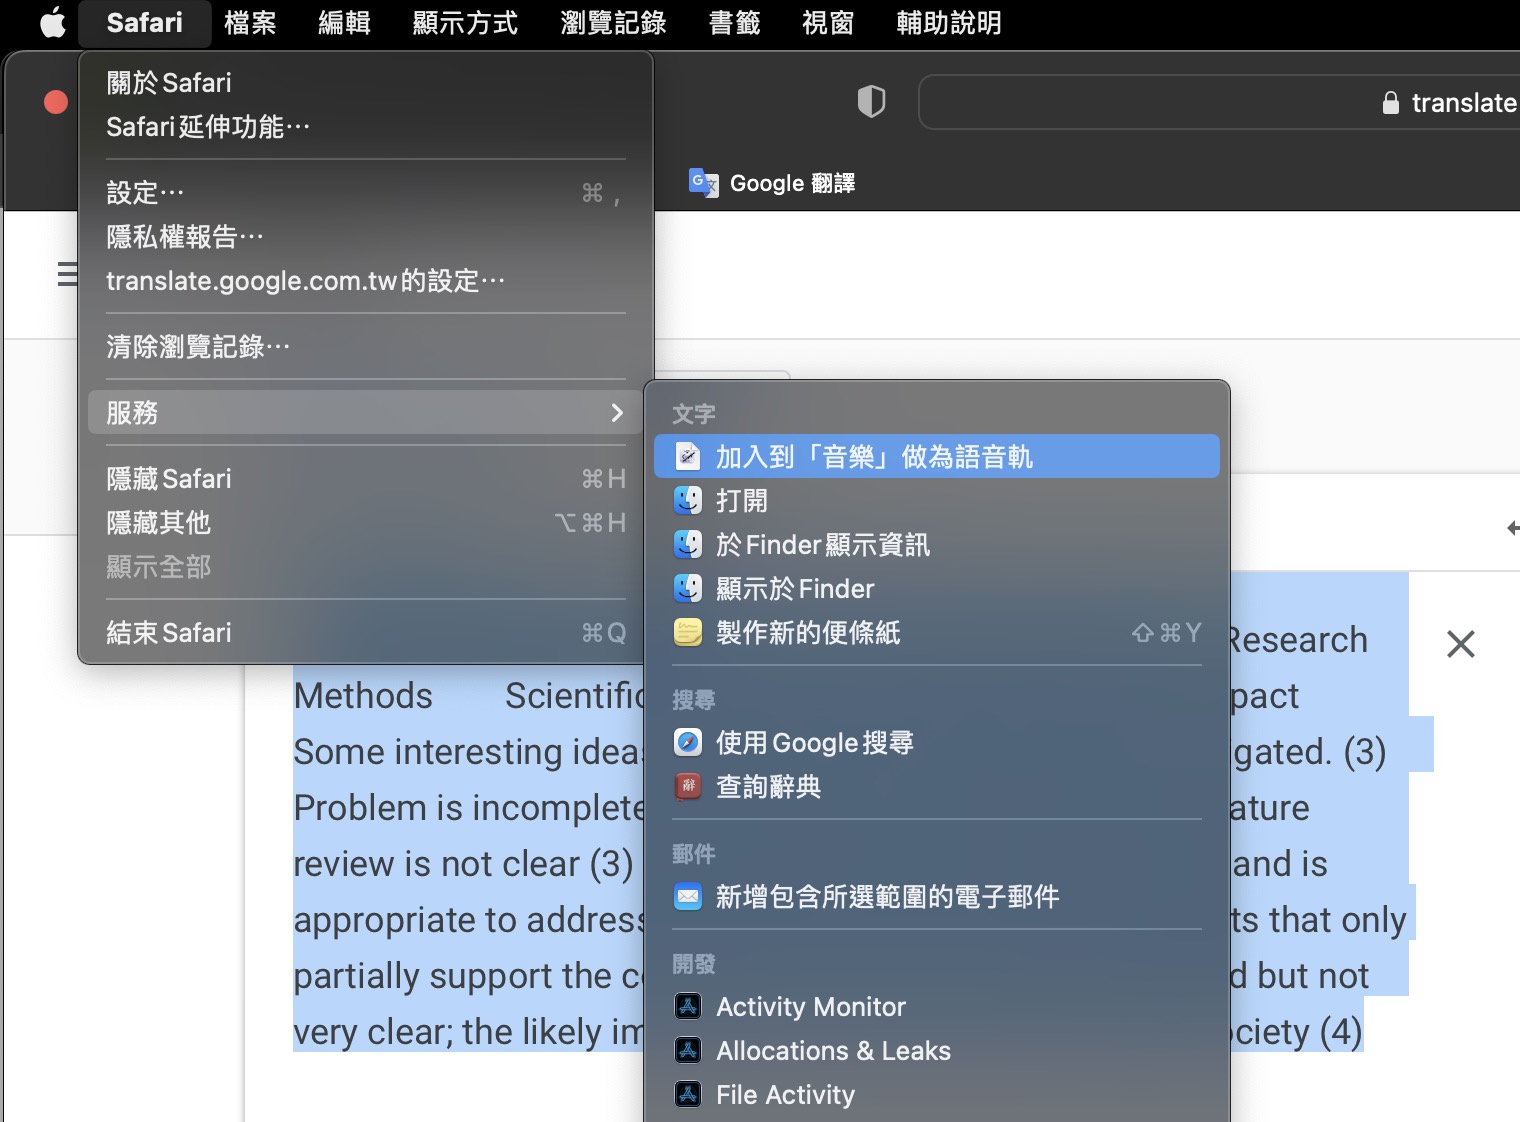
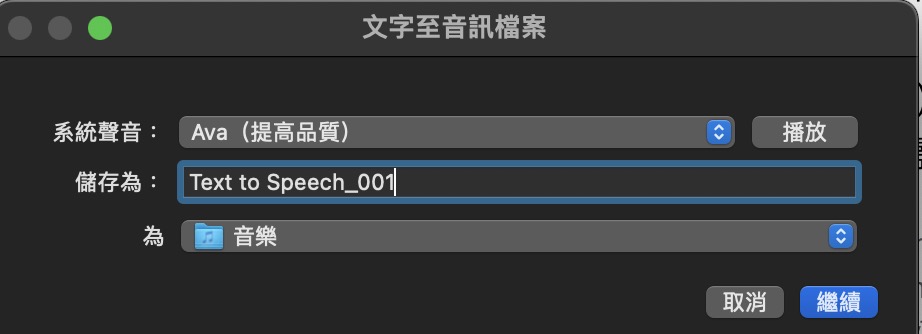
- 開啟Safari 這邊用google翻譯當作文字介面。
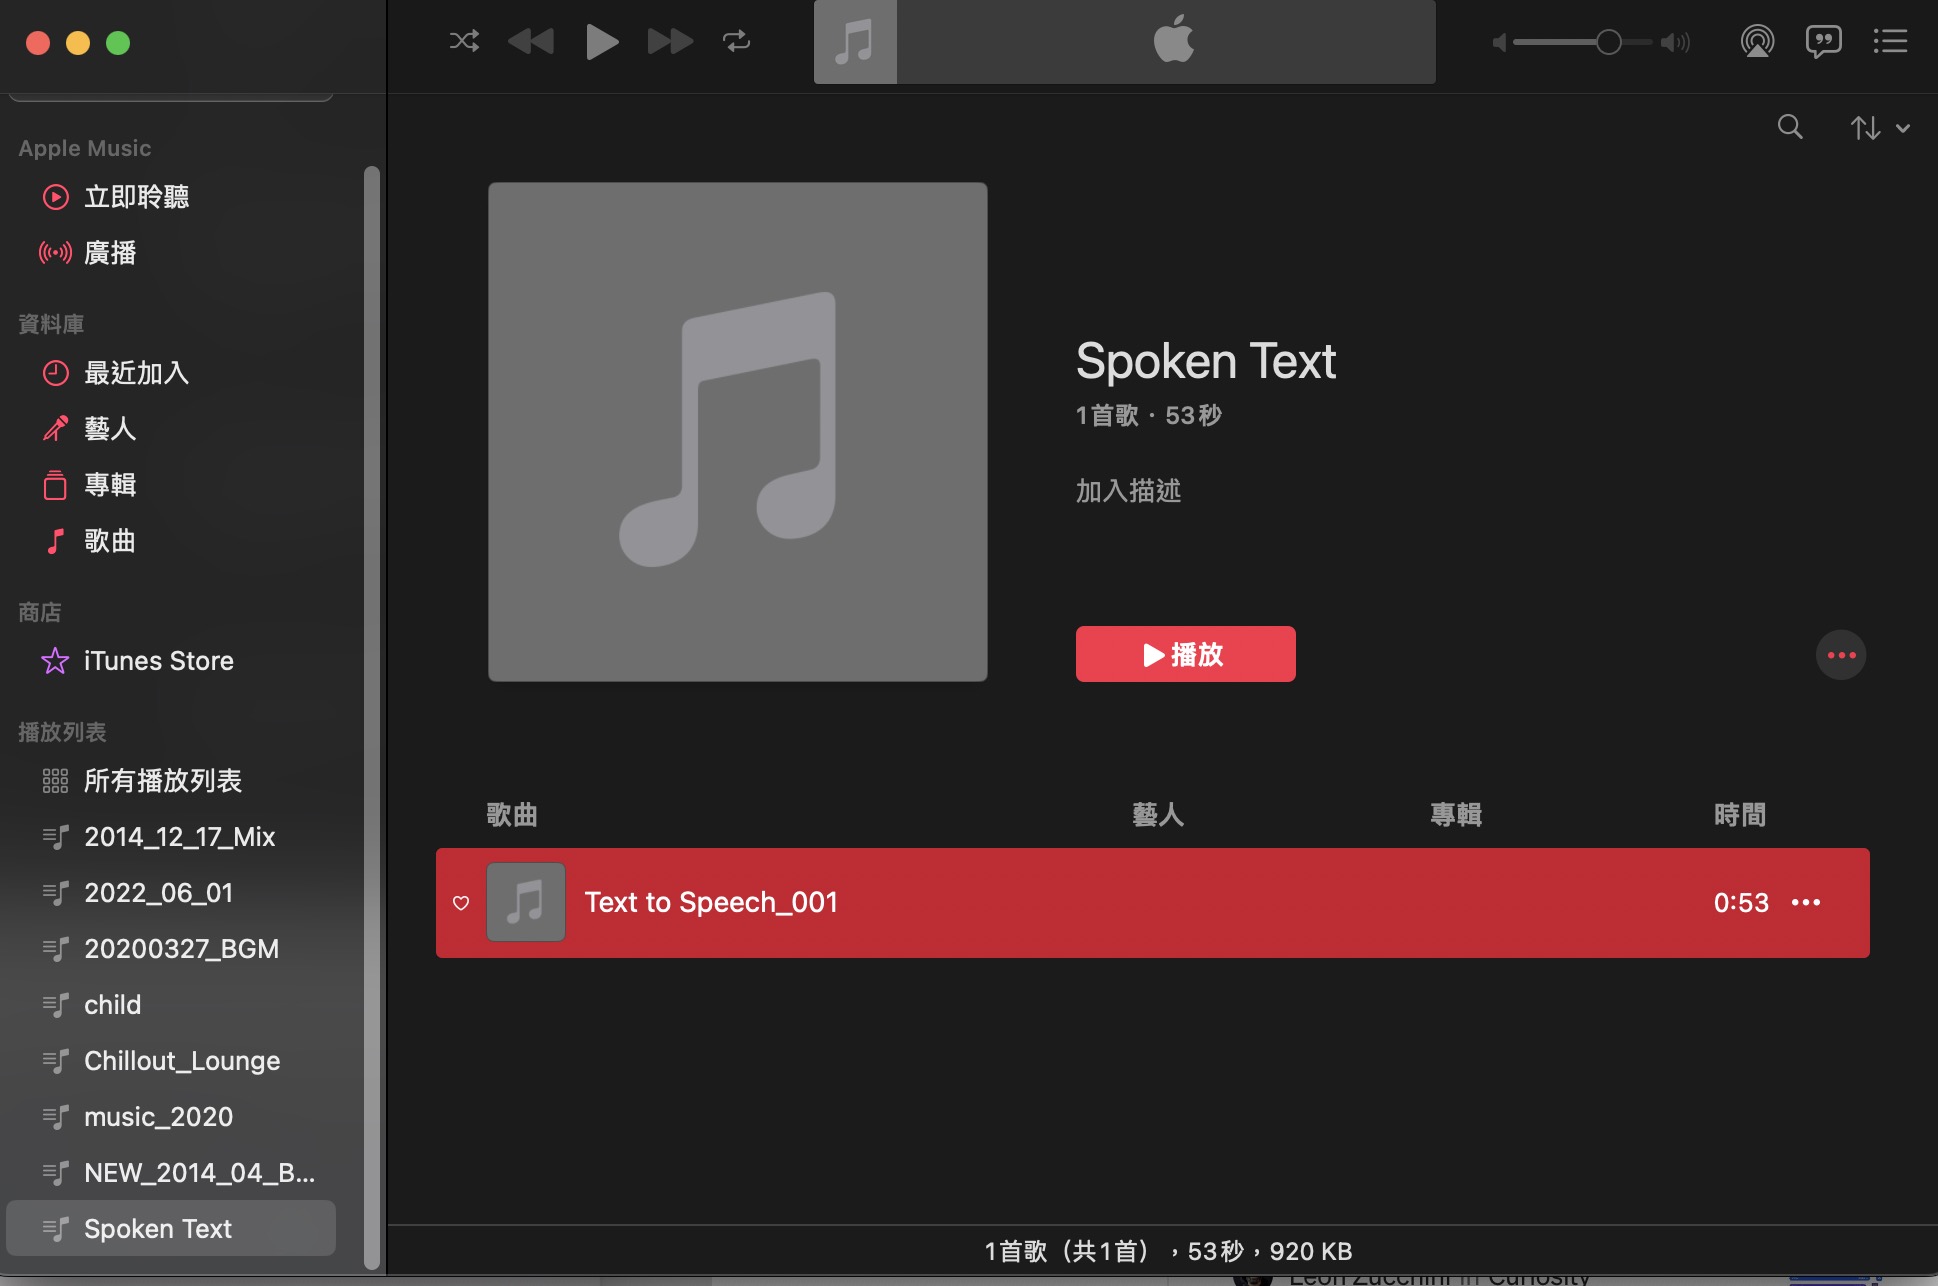
剛轉出的語音
- Adobe Express (免費線上使用 自動選取) https://www.adobe.com/tw/express/feature/image/remove-background
- PowerPoint (圖片格式->移除背景 半手動選取)
Ubuntu內建的螢幕錄影ctrl+alt+shift+r預設只錄三十秒
修改錄影時間限制
- gsettings set org.gnome.settings-daemon.plugins.media-keys max- screencast-length 60 #僅能錄60秒
- gsettings set org.gnome.settings-daemon.plugins.media-keys max- screencast-length 0 #不限制時間
內建QuickTime
直接開XCODE or VSCODE打字
Linux下請用vim或內建文字編輯器
XCODE or VSCODE
xcode 開啟專案 File-New-Project-Command Line Tool
/** Making a Beep with "\a" in C++ not working in xcode on mac ??

 Please go to Terminal to run you Beep code!


 cout << "alarm sound.... '\a' \n" << endl;
 cout << "alarm sound.... " << '\a' << endl;

 g++ main.cpp -o beep.exe
 ./beep.exe
 **/
Gradio, Streamlit, Dash(Plotly), Flask, Visdom
當深度學習模型完成開發時,或是預先發布MVP服務時,如何將機器學習應用轉換成APP模式,提供使用者、開發者進行體驗、回饋等功能。相比於前端的核心模型開發主要仰賴AI工程師進行,在APP應用端通常會需要考量到UI/UX設計領域,需要引入專業的前端開發工程師來接手後續APP架構。但通常由於團隊規模或是資源較少,又或是POC/MVP階段無法投注較多資源等因素,使得APP開發工作只能回頭由AI工程師自行完成。雖然,業界熱門強調全棧式工程師/開發者的專業素養,然不全然有益於對個別專業領域的發揮。因此,核心開發人員是否有選項可以最少的成本完成終端APP可視化部署的任務。
- Visdom 方便展示多圖、圖照片、影片、繪圖
- Plotly是Dash的企業版,Dash僅用過車輛偵測的範例,介面尚可。
- 最近用過Gradio,簡單好用,尤其今年加入Blocks功能使得佈局彈性以及input/oupt多層次串接都比較好寫了。缺點是預設的外觀很普通,如要漂亮的外觀似乎可以經過theme/CSS方式修改,但未曾嘗試。(ps. theme在目前版本v3.12.0的Blocks與的Interface都不能改了!!)
- Flask 用來直接寫API endpoint,反而沒試web介面,因為像Flask/django介面要漂亮都是要套CSS或板模,非專業的人不可能自己寫出漂亮的介面。
- Streamlit跟Gradio相同,主打AI模型的展示與線上互動demo,因此介面都幫你寫好了但就是不太美觀。
- Visdom 方便展示多圖、圖照片、影片、繪圖。
- Plotly是Dash的企業版,例如以Dash實現車輛偵測的線上服務,強項在儀表介面數據分析的呈現。
- Flask 用來直接寫API endpoint,因Flask/django介面要美觀均要套CSS或板模,非專業的人較難短時間內寫出漂亮的介面。
- Streamlit跟Gradio相同,主打AI模型的展示與線上互動demo,因此高階介面都能夠直接呼叫,但同樣自由度與美觀度就有限制。
- Gradio,與Streamlit都簡單好用但更高階,尤其今年加入Blocks功能使得佈局彈性以及input/oupt多層次串接都比較好寫了。缺點是預設的外觀很普通,如要漂亮的外觀似乎可以經過theme/CSS方式修改。
範例
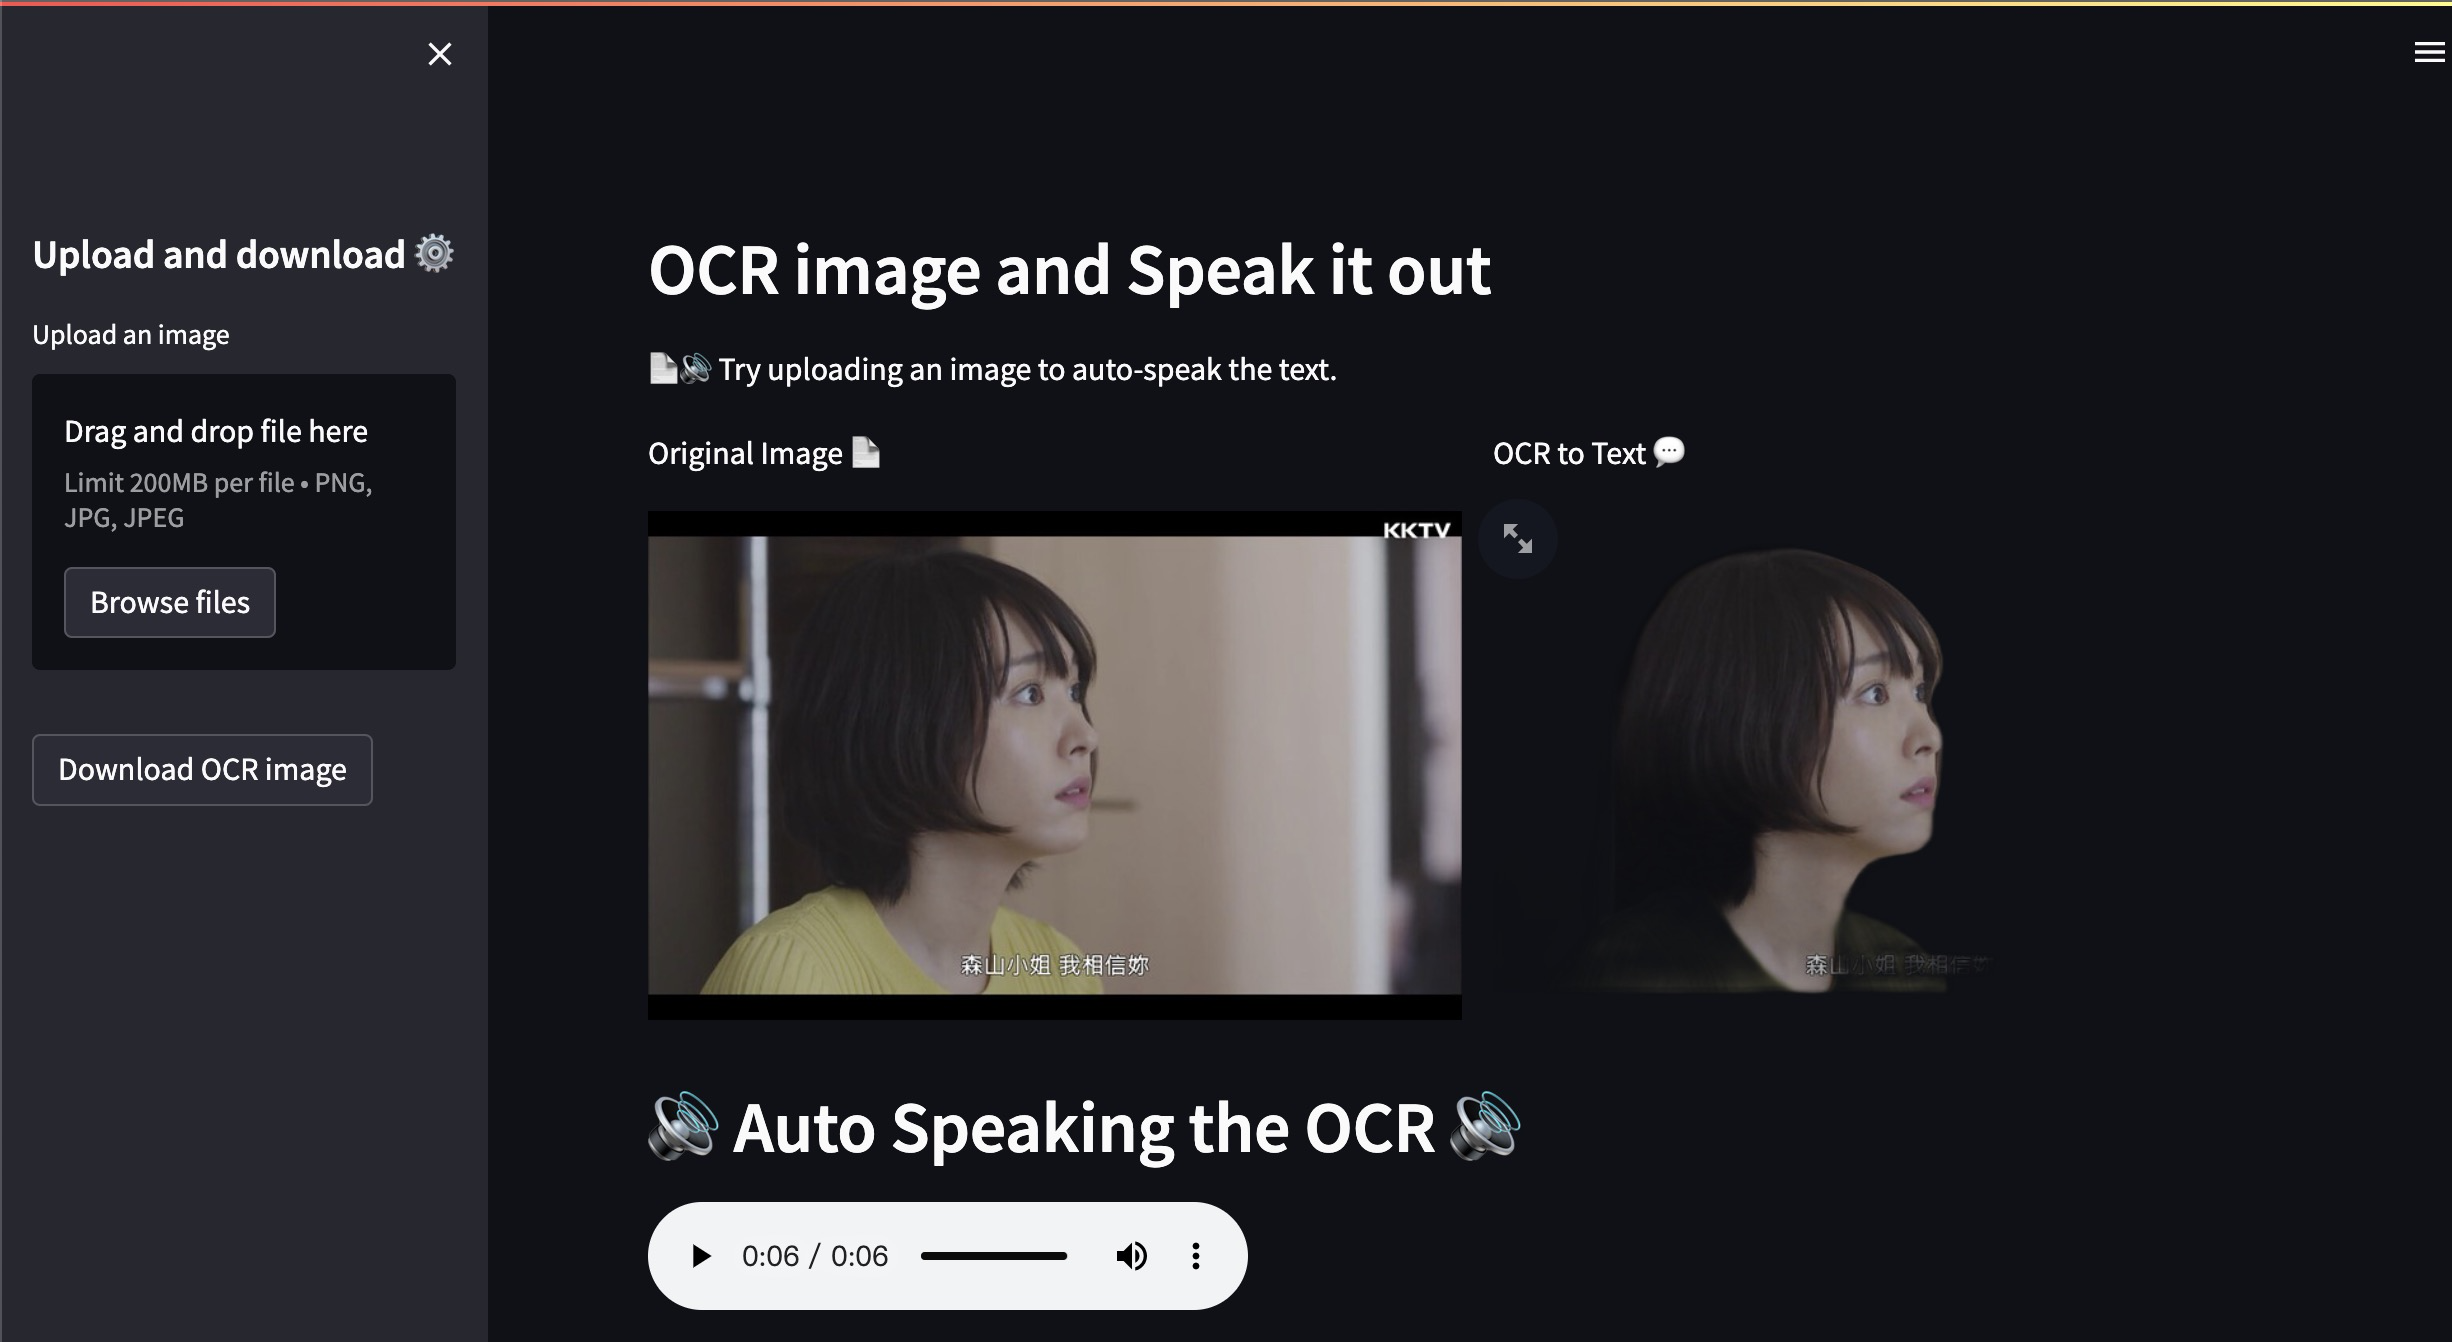
範例 ppocr+gTTS
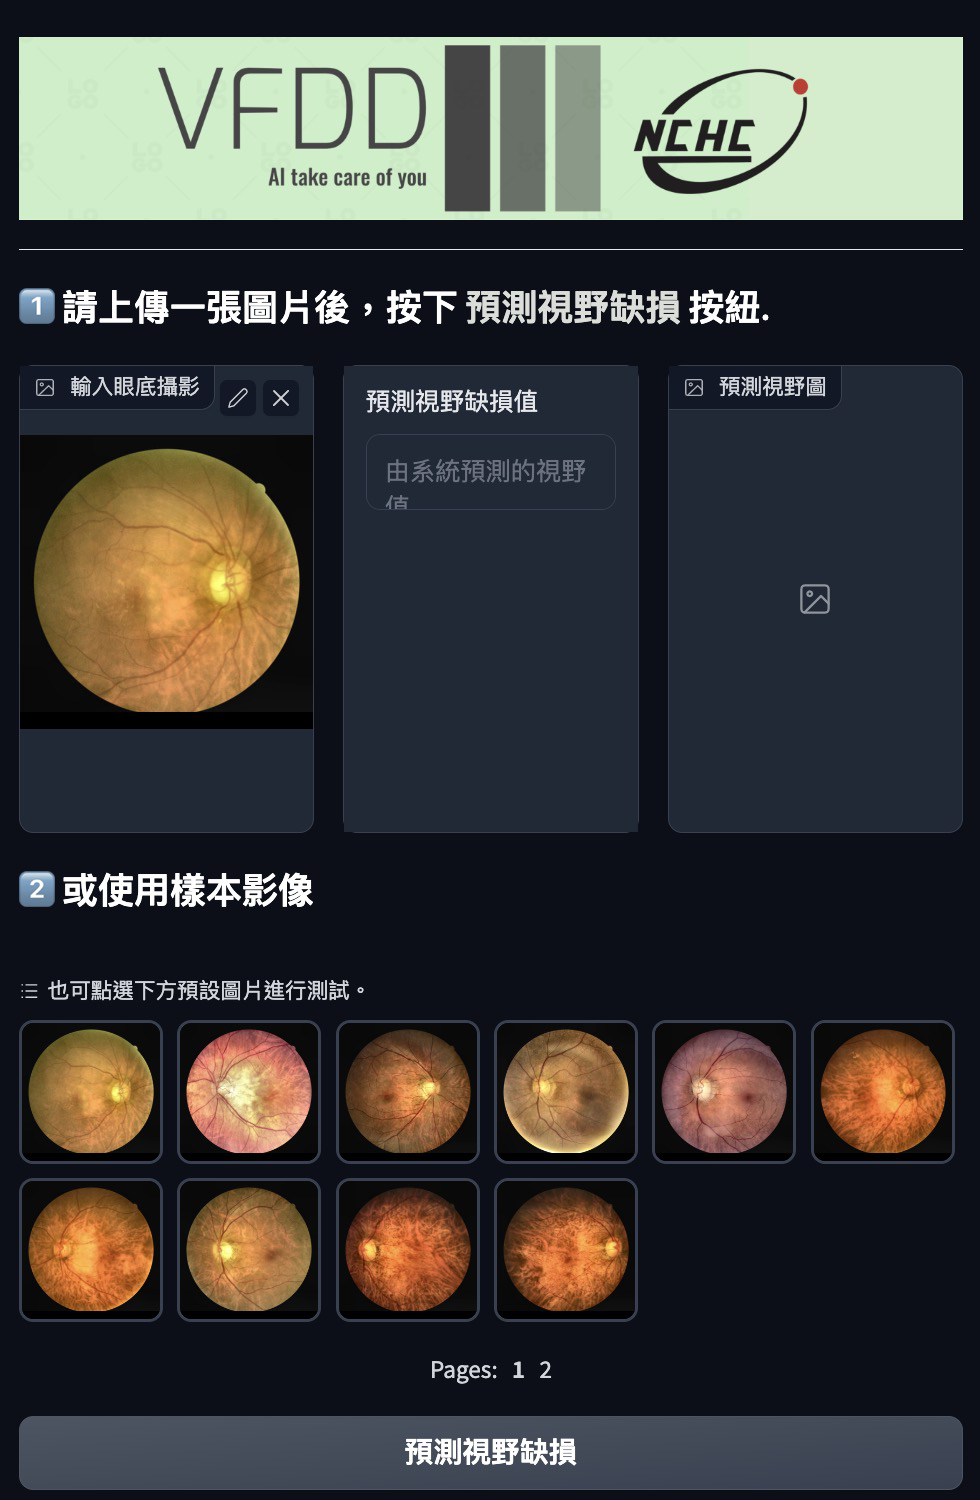
範例 Image Captioning + 雅婷TTS
基於中文圖像描述系統開發時之先導性展示平台,用以測試現有系統性能以及未來改善之用,需將生成的中文描述句子直接朗讀出來,以供視障閱讀者聽取圖片內容。
若自動播放沒有作用,請打開網頁瀏覽器的允許播放音效設定。把該APP網址加入允許列表。
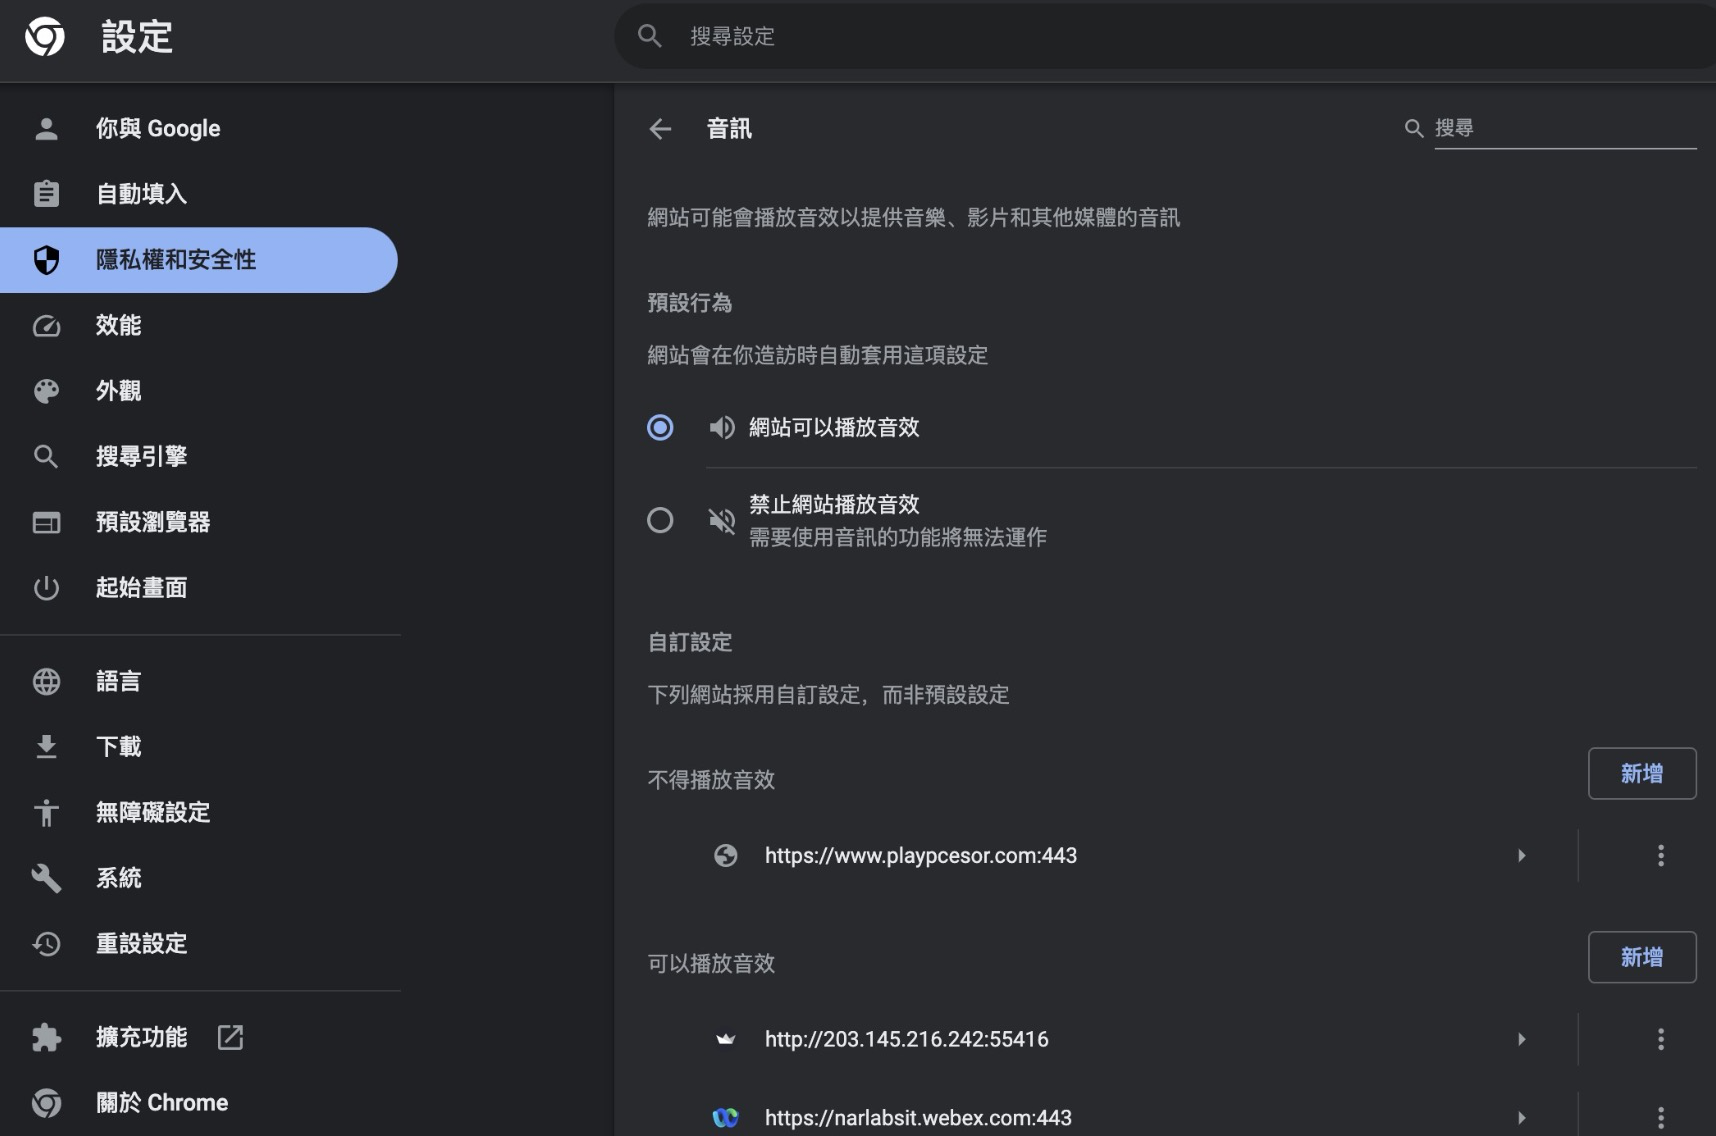
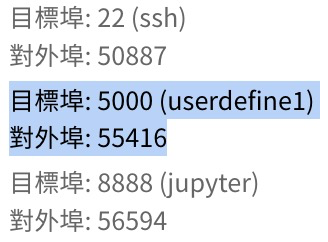
$streamlit run bg_remove_tell-gTTS.py --server.address 0.0.0.0 --server.port 5000For client users, public IP:Port. And we need to set host IP to any. http://203.145.211.221:55416/
有個專案需要做TTS把辨識出的文字轉成中文語音並朗讀出來,測了幾種的感想:
- gTTS : 谷歌本家翻譯裡的發音工具,安裝最方便,支援多國語音包含中文但僅有女聲。
- pyttsx3 : 發音工具來自各平台內建的語音系統,Windows上使用的是sapi5語音合成引擎,Mac OS X上是nsspeech合成器,eSpeak其他Linux平台上使用。但espeak中文發音其糟無比。
- PPTTS:槳槳出的語音合成工具,套件安裝法目前有衝突,建議先用docker安裝。語音品質大約與gTTS相等或略好,但有多種男女人聲可選用,也能夠自製訓練。
- 雅婷語音:台灣AI實驗室出品的商用產品,是目前聽到中文語音品質最優的,申請會員有1000元免費試用額度。請大家支持在地研發。
| TTS | 安裝難度 | 中文發音品質 | 使用方式 | 使用成本 |
|---|---|---|---|---|
| gTTS | 低 | 高 | cli,py | Free |
| pyttsx3 | 中 | 低* | py | Free |
| PPTTS | 高 | 高** | cli,py | Free |
| 雅婷TTS | 低 | 極高*** | Rest API | 720TWD/每百萬字元# |
*僅指Linux下使用espeak時 **僅指PPTTS之試聽檔案 ***實際API試用 #請注意,一個中文字用2個字符計算,全形符號兩個字符,半形符號與空格一個字符。
AHK: autohotkey 用於微軟視窗作業系統中的腳本控制自動化滑鼠、鍵盤操作。跨平台上有AutoHotkey.py包了DLL來使用,最新在2021年。
GT7 with AHK : 利用AHK來控制在Windows中的PS remote視窗,以達成自動跑圈、刷卷功能。
PyAutoGUI: Python的腳本控制滑鼠、鍵盤與其他應用程序的自動化操作。PyAutoGUI 只能在 Windows、macOS 和 Linux 上運行,現在 PyAutoGUI 只處理主監視器。 pynput:自製熱鍵(停更)。
自動網頁點按與隨機換頁導航
- [python]依靠pynput和pyautogui替换ahk https://zhuanlan.zhihu.com/p/133096887
Pandoc is the swiss-army knife of converting documents between various formats. While being able to deal with heavy-weight formats like docx and epub, we will need it for the more lightweight markdown. To be able to generate PDF files, we need LaTeX. On OSX, the solution of choice is usually MacTeX.
注意 若有中文字、符、空格 報錯 ex: ! LaTeX Error: Unicode character 關 (U+95DC) not set up for use with LaTeX. 請去研究latex中文支援問題。不然轉兩次,先轉成docx再用word輸出pdf。
$ brew update
$ brew install pandoc
$ pandoc -o out.pdf inputgithub.md
除了pandoc,max內建工具可以轉。
pdf是一種layout描述不是格式,需要解析後轉換,例如轉成html txt等,再用pandoc轉成docx。
pdf2docx就是利用解析pdf內的文字、圖片(by PyMuPDF),也可以當作內容的擷取工具,讀取出內容物後再幫你轉成docx格式(by python-docx)。
https://github.com/dothinking/pdf2docx
from pdf2docx import Converter

pdf_file = '/path/to/sample.pdf'
docx_file = 'path/to/sample.docx'

# convert pdf to docx
cv = Converter(pdf_file)
cv.convert(docx_file)      # all pages by default
cv.close()- 若是AttributeError: partially initialized module 'cv2' has no attribute '_registerMatType' (most likely due to a circular import) 是因為cv2版本過舊,請更新opencv-contrib-python,並把opencv-python移除,或保留其中一個即可。
pdf2docx - Command line interface for ``pdf2docx``.
 ▶ pdf2docx convert YourPDFfile.pdf
YourPDFfile.docxUse Imagemagick convert to convert the still images to GIF is the best choice!
convert -resize 65% -delay 30 -loop 3 `ls -v ./zhuyin_encoder_48-128_ckpt_cleanGT/*.jpg` ZhuYin_64-128_ckpt_cleanGT_evl_results_convert_2k_0.65_epoch.gif

convert -resize 100% -delay 30 -loop 3 `ls -v ./zhuyin_encoder_48-128_ckpt_cleanGT/*.jpg` ZhuYin_64-128_ckpt_cleanGT_evl_results_convert_2k_1.00_epoch_22.gif
Use ffmpeg to convert the still images to GIF!
#gif_ffmpeg_convert.sh

#!/bin/sh
palette="/tmp/palette.png"
filters="fps=15,scale=640:-1:flags=lanczos" #加入反轉reverse如右即可=>" =lanczos,reverse" "
ffmpeg -v warning -i $1 -vf "$filters,palettegen" -y $palette
ffmpeg -v warning -i $1 -i $palette -lavfi "$filters [x]; [x][1:v] paletteuse" -y $2
Select an example video
We assume that the video is stored as a list of JPEG frames with filenames like <frame_index>.jpg.

For your custom videos, you can extract their JPEG frames using ffmpeg (https://ffmpeg.org/) as follows:

ffmpeg -i <your_video>.mp4 -q:v 2 -start_number 0 <output_dir>/'%05d.jpg'
where -q:v generates high-quality JPEG frames and -start_number 0 asks ffmpeg to start the JPEG file from 00000.jpg.
ffmpeg -i 5000_cycle.mp4 -vf fps=1 -qscale 0 5000_cycle/5000_cycle_%05d.jpgffmpeg -y -framerate 1/5 -i img_%02d.jpg -r 20 -qscale 0 vid.mpg
-framerate 1/5 強制輸入為五秒一張圖, fps = 0.2
-r 20 輸出為20fps,因為是靜態圖了因此可以省略,能減少大小
-qscale 0 輸出為原始畫質
小缺點是畫面大小會有調整現象,造成畫面跳動,將輸出改成avi即可解決。# .\ffmpeg.exe -i out_tag_renum_image/image_%05d.jpg video.mp4
# 2023-07-27 流場顯像範例 GenAI
WaterWaveViz$ffmpeg -start_number 50 -i output/WW_45M5000cycle+45M3000cycle_640x480_%05d.jpg in-prd-gt_mask.mp4
ffmpeg -start_number 50 -i output/WW_45M5000cycle+45M3000cycle_640x480_%05d.jpg -vf fps=5 in-prd-gt_mask_r5.mp4
# 設定輸入時的framerate限制,而不是輸出的-r or fps=!!
$ffmpeg -start_number 50 -framerate 10 -i output/WW_45M5000cycle+45M3000cycle_640x480_%05d.jpg in-prd-gt_mask_fr10.mp4
# crop out to inp_pred
"""Crop area with size 100x100 at position (12,34).
crop=100:100:12:34
100:100 希望crop保留的大小
12:34 裁剪起點x:y
"""
ffmpeg -i in-prd-gt_mask.mp4 -vf crop=iw-110:ih-860:55:430 in-prd-gt_mask_crop-in-prd-gt.mp4 -y
ffmpeg -i in-prd-gt_mask.mp4 -vf crop=3115:ih-860:55:430 in-prd-gt_mask_crop-in-prd.mp4 -y
ffmpeg -i in-prd-gt_mask_fr10.mp4 -vf crop=3115:ih-860:55:430 in-prd-gt_mask_fr10_crop-in-prd.mp4 -y
- Python產生list檔名列表再排序後改名,Python: natsort 排序套件,重新將取得的list排序。
import os
from natsort import natsorted

file_list = os.listdir(dir)
file_list = [x for x in file_list if x.endswith(".jpg")]
file_list = natsorted(file_list)

print(file_list)

# moving
#shutil.move('test.txt', dest_dir)

# rename
#os.rename(dir + src, dir + dst)

# or save as list.txt for ffmpeg
with open('list.txt', 'w') as f:
f.writelines(file_list)- 利用ls產生檔案列表.txt,注意檔名排序,適合檔名本身就有包含數字排序時。
https://stackoverflow.com/questions/30121222/convert-all-images-in-directory-to-mp4-using-ffmpeg-and-a-timestamp-order

$ls test_out/*.jpg | sort -V | xargs -I {} echo "file '{}'" > jpg_list.txt

$ffmpeg -r 20 -f concat -i jpg_list.txt -c:v libx264 -r 20 -pix_fmt yuv420p out.mp4-
注意![concat @ 0x7ff131004300] Unsafe file name 'test_imgs/20230914_somename(1).JPG' jpg_list.txt: Operation not permitted
-
-safe 0 before -i
$ffmpeg -r 20 -f concat -safe 0 -i jpg_list.txt -c:v libx264 -r 20 -pix_fmt yuv420p out.mp4
影像排序問題:不同OS系統或工具產生的檔案列表的檔名排序不盡相同,若輸出的影片出現跳格、插格現象,請檢查排序。
    input$tree -d
.
└── blood-vessel-segmentation
    ├── test
    │   ├── kidney_5
    │   │   └── images
    │   └── kidney_6
    │       └── images
    └── train
        ├── kidney_1_dense
        │   ├── images 2279
        │   └── labels
        ├── kidney_1_voi
        │   ├── images 1397
        │   └── labels
        ├── kidney_2
        │   ├── images 2217
        │   └── labels
        ├── kidney_3_dense
        │   └── labels 501 (but the label is less than the image number!! 0496.tif~0996.tif 剛好501張!
        └── kidney_3_sparse
            ├── images 1035 files
            └── labels 1035 files

kidney_3_dense缺的images要重複使用自kidney_3_sparse/images/,除了手動選取0496.tif~0996.tif然後複製貼上外,另一個方法。雖然繞了遠路,在沒有UI下應急。

    {半自動拷貝:製作所有拷貝的指令列表,已知labels跟images的檔名相同,只要從images中拷貝一樣的labels檔名即可。}
    $cd kidney_3_dense/
    $mkdir images
    $cd labels
    $ls *.tif | sort -V | xargs -I {} echo "cp ../kidney_3_sparse/images/{} ./images/" > ../tif_label_list.txt
    $cd ..
$bash -i tif_label_list.txt
▶ ffmpeg -i Input_video.mp4 -ss 00:07:40 -to 00:09:19 -acodec copy -vcodec copy Output_cut.mp4 - 所有jpg檔案轉成寬度為2048,長度則照比例。
find . -name "*.JPG" -exec convert {}[2048x] /PATH_TO/data/CropLandImage/img_2048x/banana/{} ;&
TLDR:Overleaf支援各大期刊、研討會範本,可直接使用,唯一缺點是必須聯網使用。一開始也是為了在mac裝LaTex、中文支援、Bibtex等花了很多時間,編譯次數太頻繁對筆電來說太耗電。而且MacTeX檔案之大加上其他套件都會狠狠吃掉你珍貴的SSD,好處是可以獨立運行,也可以稍微保密的你研究工作。
client_loop: send disconnect: Broken pipe
尤其是遠端連進VM後是跑背景服務,如開容器、網頁、jupyter之類,當下的連線其實只有下子系統的工作指令,然後為了維持服務而保持連線。
客戶端 連接到服務器時,使用-o選項:
$ssh -o ServerAliveInterval=120 ubuntu@111.222.333.444 該值120代表120秒即2分鐘。
或者,將其添加到您的 ssh 配置文件中: 創建 ssh 配置文件(如果不存在): touch ~/.ssh/config 設置權限: chmod 600 ~/.ssh/config 在配置文件中設置參數。例如: echo "ServerAliveInterval 120" >> ~/.ssh/config …或使用編輯器。
或直接寫在 ▶ sudo vim /etc/ssh/ssh_config
Host *
  SendEnv LANG LC_*
ServerAliveInterval 120screen
創立新會話:使用 Ctrl + A 再按 C
分離會話: 按 Ctrl+a,然後按 d。
連接中斷的會話: 執行 screen -r。
切换窗口: Ctrl + A 后按 N 或 P 分别切换到下一个或上一个窗口。
screen -ls
刪除指定名稱之會話:screen -S session_name -X quit
以Google Forms進行會議時間調查 https://www.process.st/templates/%E4%BB%A5google-forms%E9%80%B2%E8%A1%8C%E6%9C%83%E8%AD%B0%E6%99%82%E9%96%93%E8%AA%BF%E6%9F%A5/ https://www.playpcesor.com/2017/08/google-forms-meeting-time.html
這個是一對一預約時間時 https://workspace.google.com/intl/zh-TW/resources/appointment-scheduling/

這是因為chrome字型設定問題,去chrome://settings/fonts,或是 設定->外觀->自訂字型,找到固定寬度字型,Monaco, Courier, PT Mono等字型確認OK,其他字型請自行嘗試。


只要另存成網頁就可以取得所有圖片

"""由於原始檔案過大將原有png格式另存jpg減少空間。
"""
from PIL import Image
import os

# 定義資料夾路徑
folder_path = "webpage/Robot Classification.fld"

# 確保資料夾存在
if not os.path.exists(folder_path):
    print(f"資料夾 {folder_path} 不存在!")
    exit()

# 遍歷資料夾中的檔案
for filename in os.listdir(folder_path):
    if filename.endswith(".png") and filename.startswith("Robot Classification_2914_image"):
        # 構建完整檔案路徑
        old_path = os.path.join(folder_path, filename)

        # 打開圖片
        with Image.open(old_path) as img:
            # 保持比例縮放到寬度 800 像素
            width, height = img.size
            new_height = int(height * (800 / width))
            resized_img = img.resize((800, new_height), Image.Resampling.LANCZOS)

            # 轉換為 RGB 模式(JPG 要求)
            rgb_img = resized_img.convert("RGB")

            # 生成新的檔案名稱(替換副檔名為 .jpg)
            new_filename = filename.replace(".png", ".jpg")
            new_path = os.path.join(folder_path, new_filename)

            # 儲存為 JPG
            rgb_img.save(new_path, "JPEG", quality=95)
            print(f"已轉換並儲存: {new_filename}")

print("所有圖片轉換完成!")如果你在「磁碟工具程式」中找不到安全抹除選項,可以使用 macOS 內建的 diskutil 命令列工具來執行。這個方法能讓你強制執行多重覆寫,徹底清除資料,不給復原工具任何機會。
- 第一步:找到正確的磁碟標識符
- 打開「終端機」(Terminal),輸入以下指令來列出所有連接的磁碟。
diskutil list
- 終端機將顯示一個列表,看起來像這樣:
/dev/disk0 (internal, physical):
#: TYPE NAME SIZE IDENTIFIER
0: GUID_partition_scheme *500.3 GB disk0
1: EFI EFI 209.7 MB disk0s1
2: APFS Container disk1 500.1 GB disk0s2
/dev/disk2 (external, physical):
#: TYPE NAME SIZE IDENTIFIER
0: GUID_partition_scheme *1.0 TB disk2
1: APFS Container disk3 1.0 TB disk2s1
-
仔細檢查列表,找到你的外接硬碟。根據硬碟大小和名稱,確認它的磁碟標識符(Identifier),例如 disk2。
-
第二步:執行安全抹除命令
-
一旦你確認了正確的磁碟標識符,就可以執行安全抹除命令了。diskutil 提供不同的安全抹除等級,數字越大代表覆寫次數越多,安全性也越高,但會花費更長的時間。
-
選項一:單次覆寫(最快)
-
這個選項會用單次隨機數據覆寫整個磁碟。比單純的格式化安全,但仍有可能被高級復原技術還原。
-
真的巨慢,2TB硬碟5分鐘進度1.5%
diskutil zeroDisk /dev/diskN
- 選項二:三次覆寫(推薦)
- 這個選項符合美國國防部的安全標準,會覆寫磁碟三次。在安全性和時間上取得了很好的平衡,足以應對大多數資料復原情況。
真的巨慢,2TB硬碟5分鐘進度0.3%
diskutil secureErase 2 /dev/diskN
- 選項三:七次覆寫(最安全,耗時最長)
- 這個選項會覆寫磁碟七次,提供最高的安全性,幾乎不可能被復原。但請注意,這將是一個非常耗時的過程。
diskutil secureErase 3 /dev/diskN
- dd 2TB zero複寫大約5分鐘5%
3.49GiB 0:03:47 [15.9MiB/s]2TB~2000GB要兩千分鐘!! - if=/dev/urandom 隨機資料來覆蓋舊資料,讓復原更加困難。不過,這個過程會比使用零值慢得多。
- 使用 pv:你可以安裝 pv(Pipe Viewer)工具來顯示進度,指令會變成:
~ ▶ sudo dd if=/dev/zero | pv | sudo dd of=/dev/diskNN bs=1m
- 格式化:dd 指令執行完畢後,硬碟會變成一個沒有分割區和格式的原始狀態。你需要再次使用「磁碟工具程式」或 diskutil 來重新建立分割區並格式化,才能正常使用。
是因為 git clone 的設計只能用來下載整個儲存庫 (Repository),而不支援直接下載儲存庫內部的特定資料夾路徑(/tree/main/...)。
當您把網頁瀏覽器的網址直接貼到 git clone 後面時,Git 會找不到這個「不存在」的儲存庫位址。
✅ 解決方案 1:複製整個儲存庫(最簡單) 您可以先複製整個儲存庫,然後再進入您感興趣的資料夾。
# 複製整個專案
git clone https://github.com/NVIDIA/cuda-q-academic.git

# 進入目標資料夾
cd cuda-q-academic/quick-start-to-quantum
✅ 解決方案 2:稀疏檢出 (Sparse Checkout) 如果您只想下載那個特定資料夾,而不想要整個專案(節省空間),可以使用 Git 的「稀疏檢出」功能:
# 1. 建立一個新資料夾並進入
mkdir cuda-q-quickstart && cd cuda-q-quickstart

# 2. 初始化 Git
git init

# 3. 設定遠端來源
git remote add -f origin https://github.com/NVIDIA/cuda-q-academic.git

# 4. 啟用稀疏檢出
git config core.sparseCheckout true

# 5. 指定要下載的路徑
echo "quick-start-to-quantum" >> .git/info/sparse-checkout

# 6. 拉取資料
git pull origin main